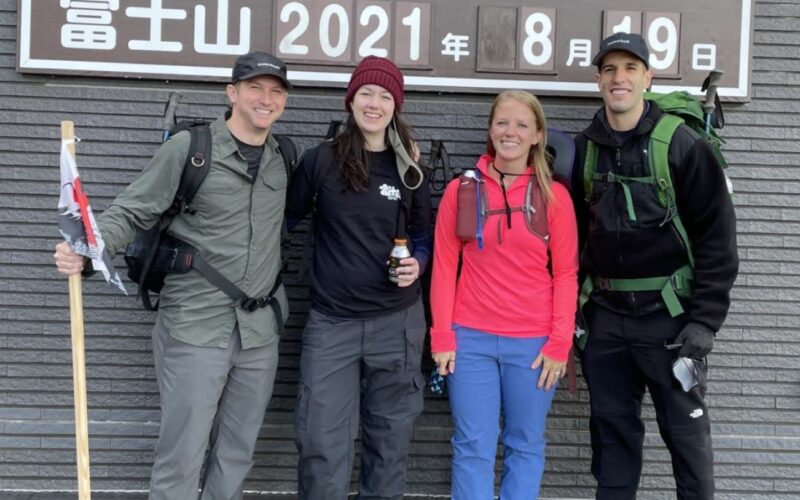
August 19, 2021 – the day we conquered the mountain and broke the curse of Mt. Fuji!
6 Things to Know Before Climbing:
1 – Internet trolls and misleading blogs will tell you that climbing Mt. Fuji is easy. They say children and the elderly do it all the time, so no training or preparation is necessary. I saw some commenters in popular hiking groups laugh about telling foreigners how easy it is. Let me tell you, it’s not easy. Yes children and the elderly do climb it, but they take their time. At a certain elevation I noticed I needed to take a separate breath for every step and every step was a mere inch in front of my other foot. I got blisters on my heels and big toes. My thighs were burning. Charlie horses started on the way down. I fell (and rolled) multiple times in the rain and fog on loose volcanic gravel. I didn’t expect any of that because of how easy the internet said it would be. That said, we finished the climb and descent in less than 10 hours and I wouldn’t say I’m extremely fit. I work out 3x a week for 30-60 minutes with light weights. So this climb is do-able for a moderately fit person of any age, but it doesn’t make it “easy”. Be prepared for a physical and mental challenge, especially if the weather is feeling rude. If you have great weather it will be significantly easier.
2 – Taking Ibuprofen in advance can prevent altitude sickness, described as feeling like a “nasty hangover” with headache, nausea, and confusion, according to this study conducted at a similar altitude. It can also make the symptoms less intense. I took 600 milligrams several hours before the climb and again before the descent and had minimal altitude side effects. Make sure to hydrate even more when taking ibuprofen.
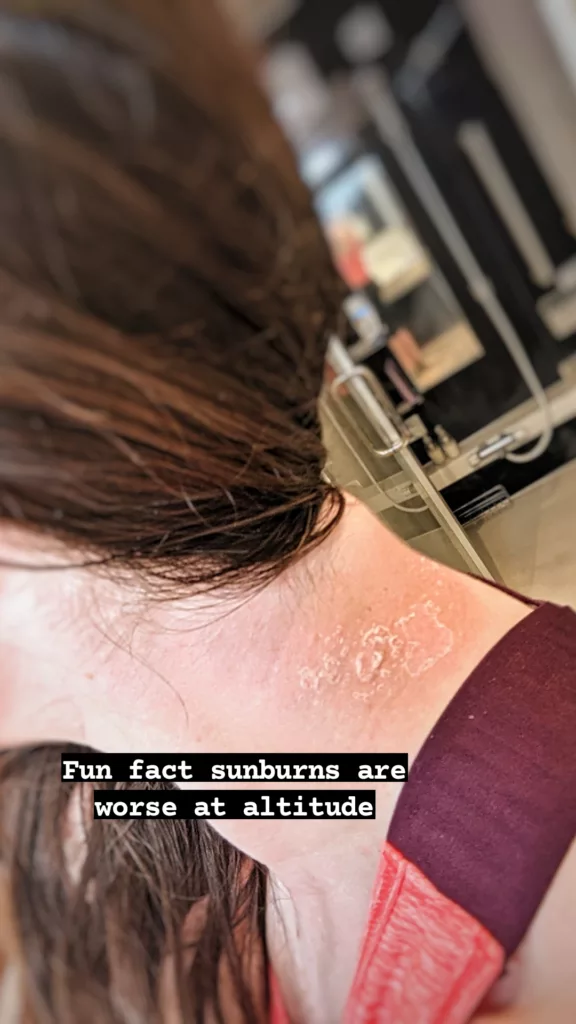
3 – The sun is stronger at altitude. Reapply your sunscreen more often than it says on the bottle and include oft-forgotten places like hands, ears, and neck. There is less atmosphere to block sunrays at higher altitudes, so the sun’s intensity grows by 8-10% per 1,000 feet of elevation. Fuji is ~12,000 feet tall. Most of our climb was rain and fog yet look at my neck blistering: Learn from my mistakes!!

4 – The mountain can throw all 4 seasons’ weather at you regardless of the forecast. Pack light, but make sure you are equipped for sunshine and heat as well as rain and cold. Our climb started at around 80 degrees F and the summit was 30 degrees F with extreme winds and rain, so it felt much colder. I couldn’t use the GoPro at the top because my hands couldn’t feel the buttons and were shaking too much.
5 – There are many ways to climb; do your research and choose what’s right for you. Most people start at 5th Station (about 7500 feet in elevation). There are four different trails and three different methods:
-Sunrise Climb (with an overnight rest in a mountain hut part way up)
-One-Day Climb (we chose this),
-Bullet Climb (not recommended. climbing in the dark? no thanks!).
We picked the Yoshida trail for our first climb because it’s the easiest and most popular. Note that the trail down is different than the trail up. Yoshida is also the most crowded, but one perk of Pandemic travel while the borders are closed is that crowds are never an issue. If you decide to climb during a regular season, I would advise avoiding weekends and Bon holidays so you can escape the crowd. We chose a one-day climb because the sunrise climb takes forever and it didn’t seem like we’d get any sleep in the mountain huts anyway; they’re full of bunkbeds with lots of people snoring around you while you sleep in your hiking gear.
6 – Know how you’re getting there, getting home, and getting dinner! Climbing season is early July – early September. Parking rules and bus schedules change throughout the season (and in classic Japan fashion the websites are not always up to date, but it’s helpful to check bus.fujikyu.co.jp and japan-guide.com/bus/fuji.html). Remember on the way down – Yoshida trail is yellow. Follow the yellow signs and KEEP LEFT at the main fork, unlike my husband.
We stayed at a cute Airbnb within walking distance from Kawaguchiko Train Station and took a bus from there to Fuji 5th Station (No parking was allowed at 5th Station during the week we climbed). The weekday schedule is more limited than the weekend schedule, so the earliest bus arrived at 5th Station 7:30am. The last bus left at 5:40pm. That’s 10 hours and 10 minutes – cutting it very close!! If you miss the last bus, you may be able to beg help getting a different bus from a friendly city employee at the 5th Station trailhead or to call a taxi, which we found advertised at about $100+ from 5th Station to the base of the mountain. If the taxis aren’t available, you’ll need a backup plan. Bus number: 0555-72-6877. Taxi number: 0555-72-9900. Restaurants close early during covid, so you might end up relying on Lawson’s and 7-11 for dinner on the evening of your climb. If you can make it in time, our favorite restaurant in the area is Taisuke Izakaya. Order the pork tomato stew! The Ide sake brewery is a great place for an afternoon sake tasting the next day.
Our Packing List: Moritown is a great place to stock up on gear, and Zappos is a great place to order boots from online. Free returns!
- Wool socks (these were a lifesaver. Bring THICK socks and bring 1-2 spare pairs for when they get wet, even with waterproof shoes).
- Moleskin. Not everybody needed this but I certainly did. Once my feet got wet (my pants dripped into the shoes) it was blister central and the moleskin prevented them from getting too bad. Pre-cut some pieces or use the whole dang sheet. Gaiters may have prevented the wet feet in hindsight.
- Waterproof hiking boots. My favorites are Merrell and Salomon. Salomon has the best laces and lace-lock system in my opinion but Merrells are so comfy and come in a wide variety of sizes.
- Rain gear: raincoat, waterproof hat, waterproof bag cover, waterproof gloves. You want the coat to have a hood and to cover your waist and butt. Careful that your hat has a chin strap or can be tightened so it doesn’t blow off.
- 2 pairs of pants. I hiked up in leggings, which were much more comfortable in the warm weather and the stretchiness was great for the steep rocks. But once the rain started I was soaked through and so grateful for a change of water resistant cargo pants. You might also consider a change of underwear.
- Warm layers. My lightweight puffer vest, fleece jacket, fleece neck warmer, beanie, and long sleeve Under Armour shirt were all necessities. I would bring an even warmer top layer next time.
- Climbing poles – not a necessity but nice to have, especially on the slippery parts. Even the wood stick that you get stamps on is a nice aide sometimes, though it does not fit nicely in a backpack.
- Snacks – focus on filling snacks with protein more than light snacks with carbs. I really liked the Epic Chicken Sriracha bars. Luckily you can also get snacks at each of the Stations on the way up.
- Water – We each brought 1-2 liters but needed to buy more on the way up. A small bottle at 8th station is 500 yen (about $5). It’s a balance between not wanting to carry the weight but needing to stay hydrated.
- Sunscreen!
- Coins – 200 yen per bathroom stop and the progress stamps are between 300-500 yen at each station. I recommend changing clothes at the 9th Station rather than waiting until the summit. There are far fewer bathrooms at the top (expect a line), the doors don’t shut properly, the floor was slick with mud, there was no shelf or area to place things, and it was freezing cold (I dropped my clothes on the wet floor twice because my hands were shaking). The bathrooms further down are much easier to maneuver in.
- Phone and/or camera. The number to call for emergency help on Yoshida trail is on signs along the way and on Fuji’s official tourism sites. Right now it’s 090-5190-0167.
- Backpack (a lightweight one)
- A whistle, just in case you fall or get hurt and you’re out of sight from other hikers.
- Oxygen cans. We brought them but didn’t need them. Luckily they weigh almost nothing so it wasn’t a pain to carry. I ended up giving mine away to a fellow hiker on the way up who looked like she was on the struggle bus. You can buy the cans at Joyful Honda or many other places in advance for slightly cheaper than you’ll find them on the mountain at 5th and 8th station.
- Stuff we brought for fun: A wooden hiking stick so we could get stamps burnt on at each station. It’s 1000-1500 yen ($10-15) for the stick, which can be bought at Outdoor Rec on Base or at 5th Station, and it looks really cool when it’s done! A mini bottle of sake and 4 sake cups. If the weather was nice at the top we absolutely would have done a toast, and I’d still recommend this! But it was so cold and windy that it wasn’t worth getting it out of the backpack for us. Cupcakes for Emma’s bday. Totally recommend! It’s a great way to surprise someone at the top. We also brought sparklers for candles but no way they would have worked with the wind. An American flag for pics at the summit marker or crater. Again, way too cold and windy to bother. We couldn’t even see the crater. Keith’s Joe Burrow jersey. Totally recommend. It’s lightweight and a great memento photo of him. In hindsight it’s pretty hilarious that we trekked up 11.8 miles to the top of a mountain with drinks, desserts, flags, jerseys, and even some sparklers in our packs. #Extra.
Speaking of extra – here’s our rain gear test. 😀
